The 12 Kameleoon days of Christmas: part 11
We’re now approaching the end of our 12 days of Christmas set of blogs, which highlight some of the most powerful, and sometimes overlooked, features in the Kameleoon platform. All the previous articles can be accessed through the links below.
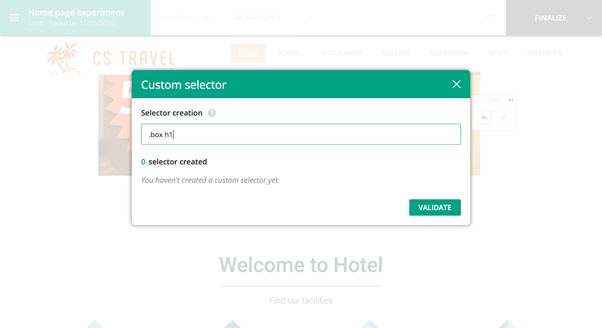
Today we turn our attention to one of the first (and oldest) technical features we have in our graphic editor - which is still completely relevant to experimentation today. This allows you to override the default behavior of our graphic editor when you select an element or a group of elements, by adding your own CSS selectors.
1 Add your own CSS selectors
Each website is unique in the way it has been designed and coded. That means that the first requirement of your graphic editor is to be able to adapt to each specific website so that anyone (with or without technical skills) can use it and make simple changes to a page on their own without relying too much on technical resources.
By default, Kameleoon’s graphic editor will choose the best method to identify an element on a page so any modifications you want to do will only be applied to this specific element on the page. You can also decide to select the element by using its HTML class. For example, you may want to change the color of all links in a menu or increase the font size of all the elements with the same CSS class.
However, there may be some situations where you want to set your own rules to better manage the modifications you want to make, such as:
- Selecting a subset of defined elements
- Overcoming insufficient precision within the default selection mode chosen by the editor
- Coping with coding issues on the page which prevent you from carrying out your modifications precisely.
This is where the "adding your own CSS selectors" feature makes complete sense - and why we designed it several years ago!
Essentially, being able to create CSS selectors enables you to go beyond making normal graphical changes, without requiring full coding from a developer using JavaScript.


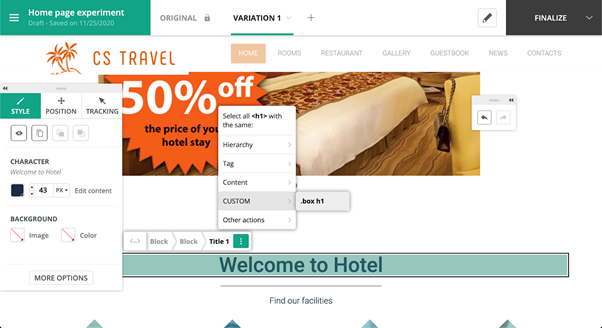
In this example changes will be applied to all elements that share the custom CSS selector ".box h1"
All of this makes creating and running personalizations and experiments simpler and faster, saving you time while ensuring consistency and reliability. Find out more on our documentation page.
Tomorrow sees the publication of our 12th and final blog, looking at modifying hover elements.
Read more in the series here:
- Day 1: Visualization of modified/tracked elements on a page
- Day 2: Reallocating traffic in case of issues
- Day 3: Simulation mode: visit and visitor generator
- Day 4: Click tracking: automatically send events to analytics tools such as Google Analytics
- Day 5: Adding a global code to an experiment
- Day 6: Excluding time periods from results
- Day 7: Measuring confidence stability
- Day 8: Switching to custom views
- Day 9: Using custom data for cross-device reconciliation
- Day 10: Personalization campaign management
- Day 11: Adding CSS selectors
- Day 12: Changing hover mode


